UPDATE 22.1.2018
My old N900 is collecting dust in a drawer for over a year now. However, the time to resurrect this beast might come soon:
https://postmarketos.org/
———-
About a week ago the USB port on my N900 stopped working. Again. This is another phase of a long battle against that strange force, which keeps breaking it. I have decided to finally give up on micro USB and find a different solution.
I have bought the N900 more than a year ago with completely broken USB, thinking, that it would be easy to re-attach it. Wrong. It requires soldering of really thin wires with patience. The port is attached in such a wrong way, that the designer should be publicly kicked in the nuts. It doesn’t require much power to break and original pads are usually torn off from the PCB. Reattachment requires to use alternative soldering points. The first place to look for a solution is this post at TMO. Seems like some people managed to repair it just fine. Did you also shiver while reading “soldering under microscope”? Is that activity inappropriate for your crude, shaking hands? Continue reading.
What I will describe here is a last resort caveman-style repair based on this post. Thanks, Storm11 and Wonko! You will need:
- soldering iron with fine tip
- screwdrivers (tiny phillips and hex-6)
- knife
- solder
- flux/colophony
- really thin wires (transformator/coil wires are fine)
- some isolation tape (scotch tape looks ugly but works great)
- spare port
- glue
Which port? Micro USB if you want to stick to it or anything else. Since mine always stopped working after random amount of time or usage, I have decided to try standard 2.54 mm socket for pin headers.
Since there are already good N900 disassembly guides on the Internet, I will get to straight to the soldering. So, you have the mainboard in front of you on the table, you got rid of possible static charge and you are ready to break repair your beloved Nokia. Check once again that you didn’t forget to cover camera sensor with a piece of tape.
- First, cut four pieces of wire about 15 cm long, strip 2 mm of coating on their one end and add some solder on it to see if it sticks. For stripping it is easiest to use a knife, although there are also more sophisticated methods.
- Put some solder on pins – +5V, Data+, Data- and GND. Ground requires much more heat, it is better to crank up the soldering teperature a bit.
- Carefully solder wires on pins. Twist Data+ and Data- wires. USB uses differential signaling, twisting improves noise resistance – it actually did not work for me at all without twisting.
If you want to use USB port, glue it in place, but upside down – with the pads exposed. - Cover every surface which can get in contact with wires by layer of tape. This is extra difficult if you have decided to use USB port in it’s original place.
- Carefully route thin wires through the device between desired places. That is from new pads to USB port or external port of your choice.
- Fasten everything in place with more tape/glue/etc. Super glue or two part epoxy works fine for strengthening the port itself.
- Finally, put the patient back together and hope for the best.
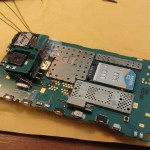
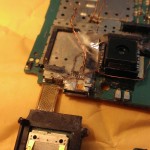
- What a mess
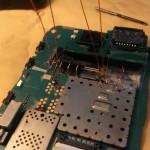
- Thin soldering tip is necessary for making new data connection.
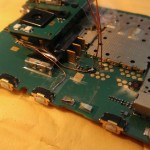
- Be very careful with soldering the +5V pad, it is the only one.
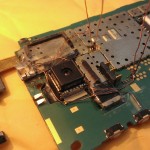
- All corners should be insulated.
- Surgically precise micro USB connections
And.. that is basically it. With luck and better hands than I have, you should get a working USB that last’s for a long time. Otherwise, wait a bit for an update about my brand new 2.54mm pinheader USB-compatible connector. Initial tests are promising. Or, check out this insane mod. Hell, that is a proper way to screw up your Nokia!
I have a good opportunity of getting an n900 for a very good price, the only problem is that it has the usb port broken.